Rosemary in the Snow


It isn't really snowing, but it is December 11th and my Rosemary plant is still producing! I finally decided to move it and strip the remaining leaves from it.  I covered it and it might spring forth in a few months, but if it doesn't it has already don't its job very well!

I ended up with almost 2 cups of Rosemary, so I used part of it to make a bottle of Orange Rosemary Vinegar. I use it to make salad dressings through the winter and it is especially good on warm salads that include roasted beets.

To make the vinegar, bring 2 cups of vinegar to a boil and quickly add the peel of an orange and 2 heaping Tablespoons of Rosemary leaves.  Turn the vinegar off and push down on the orange peel and the leaves. That will bruise them and they will release their essence into the vinegar. Immediately pour the vinegar, orange peel and Rosemary into a clean bottle or jar and put the lid on it. The heat will seal the lid.  I store this in the fridge after I open it the first time.

To use this to make salad dressing, mix equal parts of the vinegar, oil and water with half a part sugar.  Shake vigorously and pour it over your favorite salad ingredients.


Chicken Fricassee One-Potter


I needed a Saturday with absolutely nothing to do, so I created one! I enjoyed a couple of TV movies and several hours of reading. Out came the pressure cooker and I made some creamy and delicious. Chicken Fricassee has  been around for centuries and was first written about in a medieval French cookbook in 1300.
The dish was one of President Abraham Lincoln's favorite foods!

It couldn't be easier and can be made for a crowd or for one. Here's how simple it is.  Use one large boneless chicken breast and cut it into thin slices. Dust the meat in flour and brown it in a little olive oil. I use my electric pressure cooker for this, so I truly use just one pot.

Now you need to add:
2 cups of chicken broth
1 large potato peeled and cut in chunks
2 large carrots cut in chunks
1/2 cup chopped onion
8 ounces of fresh mushrooms

Cook this under pressure for 10 minutes.  Let the pressure reduce so you can remove the lid and add 2 cups of uncooked egg noodles and 1 cup of half and half.  Season with salt and pepper and rosemary.  Cook for another 6 minutes and let the pressure reduce before opening the pressure cooker.

Everything is thick, creamy, tender and delicious.


Thanksgiving Dinner 2016


I've been really busy in the last several weeks with my new job ... weekends, too. I'm finally getting around to posting some pictures from Thanksgiving dinner. Our tablescape this year was really casual. I used a set of galvanized tin chargers that I received as a Mother's Day present and added a big galvanized tin pumpkin to the composed centerpiece.

I always place a take home favor at each place setting. This year Phoebe was finally old enough to take seriously the process of talking about all the things we are thankful for. She first reached over and hugged me and said she was thankful for her grandma! She sure keeps me going!
I love galvanized tin. I don't know why, because as a kid I hated anything galvanized. While my friends moms were getting new fancy plastic buckets to use mopping the kitchen floor, at my house we still used an old galvanized bucket. Considering that some of those old buckets are still around and the plastic ones and several generations after line our landfills ... my mom was pretty smart to keep what she didn't have to replace! I guess galvanized tin is comforting. My big pumpkin came from Hobby Lobby; the chargers were found at TJMaxx and the tableware is from Pier 1.  And, yes, if you follow my blog you know that I have several sets of Thanksgiving china including Johnson Brothers His Royal Majesty, but this year I splurged for something much more casual.

As always, the fireplace mantel was decorated for the holiday, but not too extravagantly! Phoebe and I had shopped our favorite junk shop a couple weeks before Thanksgiving and we found a basket filled with more corn husk dolls, so they found a new home on the mantel ... along with blown glass red and blue pumpkins and a chicken wire pumpkin.


By the time you read this post you will be well decorated for Christmastime! Hope you enjoy it anyway!

Sweet Potato Alfredo Sauce


One of my favorite memories is from a trip my husband and I took to Louisiana. He kept making me go back to a road-side vegetable stand because he enjoyed talking to the man who staffed the stand! He was Cajun and Joe loved visiting with him. As a result, we came home with a trunk filled with bags of sweet potatoes. Not a problem ... we loved them and had a dry sun porch to store them in.  My husband loved sweet potatoes two ways ... baked and loaded with butter and salt; candied the caramelized way in a cast iron skillet on top of the stove with butter and a little bit of brown sugar. I finally managed to get him to eat sweet potato fries, but not too often.

I, on the other hand, love them all ways ... pies, soups, stews. You name it and I love it ... when it includes sweet potatoes!

This pasta sauce is too easy to make! Bake a medium to large sweet potato in the microwave. Saute 1/4 cup chopped sweet onion in 1/2 stick of butter. When the onion is soft, add a little minced garlic and a good sprinkle of red pepper flakes. Remove the flesh from the sweet potato and add it to the skillet, mashing everything together. Add 3-4  cups of half and half and 1/2 cup grated parmesan cheese. Let this combination come to a simmer. It will begin to thicken. You can remove it from the heat and use an immersion blender to puree the sauce. (I actually like texture, so I just use a whisk.) If the sauce is too thick, add some of your pasta cooking water until you get the consistency you like.

This makes plenty of sauce for a pound of cooked pasta.

Soup Time - Snack Time!


My grand daughter is a snack rat!  She loves to visit our snack supply shelf when she visits and I try to keep the jars filled for her! I store many things ... but especially snacks ... in half gallon canning jars.  I don't think I've ever used a jar that size for actual canning, but I sure love them for storage!

Everybody has their favorite oyster cracker seasoning, but this is ours.  I prepare them in the Nuwave counter top oven, so I do half a bag at a time.  A half gallon jar holds a whole bag.

I toss half the bag of crackers in 1/4 cup canola oil, 2 Tablespoons of ranch dressing mix and 1 Tablespoon of dill weed.  That is it.  Bake it at 225 degrees for 10 minutes.  Prepare the second half of the bag the same way.

In a traditional oven, you'll have to bake the crackers for about 20 minutes.

October Pork Burgers


I cannot believe we are at the end of October and the weather is still beautiful! I don't require beautiful weather to grill ... but I'm sure going to take advantage of it when it is here! In three weeks in Southern Illinois ... we could have a little early snow!

So, I used my portable Cuisinart gas grill to make some pork burgers. I always sprinkle the raw meat with a raspberry/chipotle bbq rub that I keep on hand.  It takes pork a little longer than beef to get done, but still just about twenty minutes.  I used my Nuwave counter top oven to make seasoned fries. I toss raw potato pieces in a little canola oil mixed with ranch seasoning (which I buy in bulk) and dill weed.  In the Nuwave, two potatoes cut into fries are done in about 12 minutes cooked at 350 degrees.

Pretty good!  Pretty easy!  I'll share in a couple parties on my sidebar, so click through to take a look.


Smoked Chicken & Vegetable Soup!


I'm pretty lucky!  I work for a company that has businesses in a very large multi-county region, but my base office is just a couple blocks from my house. As a result, I can take a quick trip home for lunch a couple days a week. That caused me to want to put some homemade soup in the freezer and since I had the perfect ingredients in the freezer and fridge, I decided this was the right weekend to make it.  Nothing complicated about it! I used my pressure cooker and it was done in 20 minutes.


The recipe is so simple. I had a chicken breast in the freezer ... from a day when I grilled and smoked several using cherry wood for the smoke flavor.  I chopped it, added 4 cups of chicken broth with a dash of liquid smoke.  For the vegetable, you could add almost anything you like, but I love carrots so I added 2 cups of chopped carrots, 2 cups of frozen corn kernels, a can of roasted tomatoes with their juice, a small green pepper chopped, about 1/2 cup chopped onion and a cup of frozen green peas.  Pasta would have been good, but I added 2 cubed potatoes for the starch. I seasoned the soup with fresh parsley, 2 bay leaves and a sprig of fresh rosemary.  I also used a Tablespoon of "greens flavoring" that I guy at a local meet market.  It contains salt, pepper, garlic and a little more smoke flavor. There is no right or wrong in preparing this!  Use the seasoning you like best .. but add a dash of liquid smoke to enhance the smoked flavor of the chicken.

I'll share with a couple of the blog parties on my sidebar, so make sure you click through to visit other sites!


Zoodles or Cuoodles?


I recently bought the zoodle attachment for my Kitchenaid, and I've had lots of fun with it.  I love garden fresh cucumbers and raw carrots.  This was an easy salad made with the ribbon attachment ... and tossed with a simple vinaigrette.  I make my vinaigrette with equal parts of Splenda, cider vinegar, canola oil and water.  The original combination used sugar, of course, and Splenda is actually much sweeter, so you might want to start using half as much.  I always add fresh herbs ... or fresh herbs that I've frozen for wintertime use.

If you don't have that attachment ... it is perfect for peeling and slicing apples ... and making other colorful and delicious salads.

I'll post with a few of the parties listed on my sidebar, so make sure you click through!

My Surprise Gourd!

I haven't posted too much in recent months and there is a wonderful reason why! After being semi-retired for a couple years, I decided to take a real job again ... and I love it!  I actually returned to my deepest roots in geriatric health care and I am marketing over a dozen skilled nursing facilities in my region.  Being around people who need what I do has really filled the gap in my soul that had been there since my husband died.  I am thrilled to have a reason to do things and I am equally thrilled to be able to see the results of my work!

Well ... back to the post.  In Autumn 2015, I attended a family wedding on a farm. The decorations were all real pumpkins and big squash and gourds.  Like most everybody in attendance, I came home with a trunk full of pumpkins. I used them as fall decorations outside ... then decided to move them to a corner in the flower bed and let the animals pick at the seeds through the winter.  I figured I'd have a few plants spring up ... and that did happen.  I had lots of blooms, but this is the only thing that really grew!  Isn't it beautiful?


I'll share this with a few of the blog parties listed in my side bar ... and thanks to all of you who have continued to visit me daily, even though I wasn't posting much!  I'm back in action now ... and it is fall ... my favorite season!


Sweet & Spicy Venison Loin


Seems like I've been posting lots of venison this spring and summer, but I've been cooking plenty of it ... so I've enjoyed sharing recipes. The loin is by far the best part of a deer and it doesn't take much time to cook it. I grilled this one. Here's the recipe ... and I always soak my loin in a combination of water and cider vinegar for a couple hours before I prepare it.

After rinsing or soaking the meat, dry it completely with paper towels. Make a wet rub by combining the following:

1/4 cup brown sugar
2 Tablespoons of Worcestershire sauce
a few drops of liquid smoke
1 teaspoon garlic powder
1 Tablespoon smoked paprika
1/2 teaspoon cumin
1/4 cup of olive oil

Mix this well and rub it all over the surface of the meat. You will probably have some left ... keep it to finish the meat.

On your grill, sear the meat over hot heat ... then reduce the heat to medium to continue cooking.  If you are cooking over coals instead of gas flames ... move the meat to a cooler part of the grill.  There is a great time chart for grilling venison right here.

When the meat is ready to come off the grill, brush the rest of your wet rub over the surface of the meat. Let it grill a couple more minutes.  Let the meat rest a few minutes before you slice it.


My go-to recipe for dressings for all kinds of summer vegetable salads is to mix 1/2 up mayonnaise, 1 Tablespoon mustard, 1 teaspoon sugar, a dash of salt and pepper and a couple Tablespoons of sweet pickle juice.  I use this basic foundation for potato salad, macaroni salad, mixed vegetables ... and for this delicious sweet corn salad.  I cooked 3 ears of corn using the microwave method, cut it off the cob and added an avocado cut in chunks and a hand full of cherry tomatoes cut in half.  Toss in your favorite herbs ... I used basil and rosemary ... and had a delicious salad.


I'll be sharing this post with a couple parties listed in my sidebar ... so click through to check them out!  Enjoy!

Juicy Venison Burger


Friends frequently ask me how I make venison burgers juicy. Ground venison is dry and when I grind it myself (using my Kitchenaid) I don't add any fat to it. I add ingredients when I actually use it.  My favorite thing to do is to use my food processor and finely chop about 4 pieces of raw bacon for each pound of ground venison. Mix it with the ground meat and use your favorite seasonings.  The bacon fat will add moisture and flavor.

I tried a new recipe this weekend, though.  I added 2 Tablespoons of mayonnaise, 1 Tablespoon of orange Teriyaki sauce, an egg, 1/4 cup of finely chopped raw onion ... and a slice of bread finely chopped (I put it in the processor with the onion).  Don't worry that this is going to taste more like meatloaf than a burger ... it doesn't. It reminded me of the old-fashioned Maid Rite loose meat burgers that were popular when I was kid!  The juices oozed from the sandwich and the bun got a little soggy on bottom!  Lick your fingers good!

I grilled my burgers and cooked them slowly, so most of the liquid would cook out.  They were slightly crumbly, so I had to be careful turning them and lifting them off the grill ..... but they were delicious!  While they grilled, I also grilled a foil packet filled with sliced mushrooms and butter to use as topping.  When they were finished cooking, each burger got a slice of smoked Gouda cheese.  YUMMY!  Pass more napkins, please!

I'll be posting this with a couple parties listed on my sidebar, so make sure you click through. Right now my home page is filled with venison recipes, so browse around before you move on!


Left Over Venison Roast!


A couple weeks ago, I posted my Cranberry Venison Roast and if you missed it, you can find it right here!  Of course, I had left-over roast, so I froze a couple little packages and pulled one out to make this beautiful taco salad so I could celebrate Cinco de Mayo in style!  I keep a package of dry taco mix in a shaker and use a little at a time ... so I added about a teaspoon of the taco seasoning to a couple cups of the shredded meat.  The roast had been seasoned with Chipotle, but the addition of the taco seasoning changed the flavor a little bit and made it zippy!


You can buy packaged tortilla cups these days ... these are soft flour shells, but the other night I had a crispy corn shell at a party and it was really good, too!  I just put some of the seasoned meat in the shell and topped it with a little salsa ... popped it in the NuWave oven for 10 minutes and had a wonderfully toasted treat.  When I served it, I added shredded cheddar and sour cream.


I make all my salad dressings from scratch because I don't want bottles of packaged salad dressings living in the refrigerator for a year! This dressing is simple ... 3 Tablespoons of mayonnaise with 3 Tablespoons of salsa and a Tablespoon of chopped green pimiento-stuffed olives. I have favorite ingredients for salad, but you sure can make your salad your way! Mine was made from mixed greens, radish strips, cucumber bits and slices of avocado!  Delicious ...

I'll share this with a few parties listed on my sidebar.  Make sure you browse around a little!


Cranberry Venison Roast!


If you only think of using cranberries at Christmastime, you need to reconsider! I buy extra bags in the winter and freeze them. You don't have to do anything to them except place the bag in the freezer! Then I have them all year. I also love dried cranberries ... in the cranberry flavor.  You probably know that they flavor them with blueberry and cherry ... but I like the authentic tart/sweet flavor!

I'm blessed with a friend who put a deer in my freezer this past fall ... and with a sharp-shooter sister-in-law ... who gave me another half a deer. My brother processed that one (while I helped by watching and carrying on conversation about the old days) ... so my freezer is filled with this wonderful lean flavorful meat!

Venison is so lean, it can be dry ... so I always marinate and sauce my creations. This recipe is so good and anything left from the roast makes a great sandwich the next day. All you have to do is add a little bbq sauce, if you've eaten all the original sauce!

Remember that I frequently cook for just one person, so I had my brother cut all my roasts in less than 2 pound pieces. That has been a hard thing about becoming a widow ... cooking for 1 person and it has taken me five years to learn the lessons of not having left-overs that I'll never eat.


This delicious meal began with this roast that is less than 2 pounds. It has a nice piece of fat on one edge and that adds so much flavor. No need to trim it completely, when you are slow roasting or pressure cooking ... because all the shine and fat will disappear!


I love my electric pressure cooker ... although I am not afraid to use my stove top! I browned the roast on all sides in a little olive oil, before adding the other ingredients that make a spicy sauce.


The primary spices in this sauce are bay leaves, chipotle pepper and achiote (also called annatto). Achiote is made from the seeds of an evergreen shrub and is used to flavor and color foods. Chorizo sausage is colored with annatto seeds and many rice dishes are red/bronze because of the addition of the spice. The secret spice in the chocolate drink from the Aztecs ... was probably achiote!

To my pot, I added 1/2 cup dried cranberries, 1 cup of beef broth, 1 cup of a California Shiraz, 1 teaspoon of achiote powder, 1/2 teaspoon of chipotle pepper powder and 2 bay leaves.  I pressure cooked the roast for 1 hour ... remember it was just 2 pounds.


This is the end result ... flavorful, juicy and succulent! The flavors were bold, but not overly 'hot' ... and the sweet/sour cranberry flavors made it perfect. After you remove the roast from the pot, you might have to reduce the sauce for a few minutes ... to thicken it ... but it might be perfect without doing that!  You decide.


I served the roast with buttered noodles, sprinkled with a little parsley ... and it was delicious!  I'll be sharing this with Miz Helen and a few other blog parties ... If you'd like to see another recent post about venison ... click right here!

Grilling Venison Steak


Don't you just love springtime?  I use my gas grill all winter, but there is something fantastic about grilling after the temperatures start to warm up! Don't ask me to explain that!

Grilling venison steaks is simple enough to do. I always marinate mine and this one soaked in cherry balsamic vinegar and olive oil for a couple hours. 

I grill my steaks to medium rare and these were cut thin, so it just took a couple minutes on each side ... on a hot grill. I topped the steaks with chopped green bell peppers pan seared in a little butter.  That simple.


I'll be sharing this with a couple blog parties listed on my sidebar, so make sure to click through ... especially to visit Miz Helen!  I always find yummy recipes at her party!

Strawberry Ready!


It will not be long before Southern Illinois strawberries will be ready for picking! I can't wait! I also couldn't wait to get more of my red out on the kitchen buffet! So here goes!  This cute tea set is Temptations and you know how Miss Phoebe loves her tea parties!  I'm ready!


Here's a shot of the whole counter ... lots of Temptations and the towels are from the new Pioneer Woman collection! I love the big cups to this set of dishes ... they hold 12 ounces and they are perfect for 'swirling' coffee or hot tea on the back deck in the early Springtime mornings!


Look at the cute details on the dishes ... strawberries, flowers, lady bugs! What's not to love?


I'll be sharing this post with some of the parties listed in my sidebar, so click through to see the other participants!  Thanks for stopping by.

Easter Decorations in Red!


I've always admired the beautiful red Easter Eggs that are part of Greek traditions. The red represents the blood of Christ and while that may be a theme that is complicated for a youngster ... learning about Easter traditions from all around the world is not. This year I decided it was appropriate to start teaching Phoebe about some of those traditions. So we started that process by decorating for Easter in RED! 


I was a little limited on time this year, so instead of putting my Cricut to work, I designed my banner using some cute graphics of Easter Eggs. Red checked ribbon ... and red and white polka dog ribbon connected all the elements of the decorating!


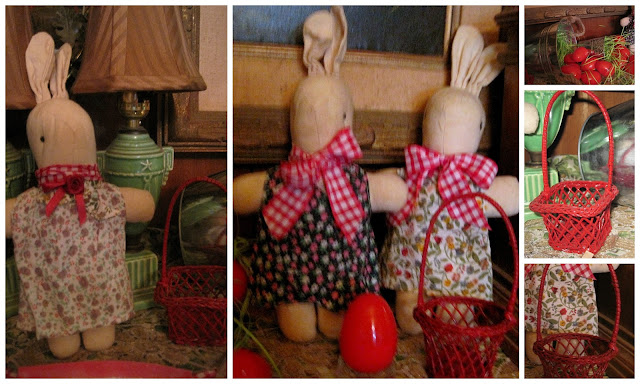
The stuffed bunnies on the fireplace mantel are actually MeMutt's ... but only because he stole them from a coffee table vignette a couple years ago! I got up one morning and found them on the floor right beside the bed. He had snatched them and brought them to his favorite sleeping spot. I have to hide them from him and he doesn't know that they are currently on the mantel or he would find a way to get them down! Most of my decor has a real 'country' feel to it ... that is just who I am!


I've left a Christmas tree up in the corner of the dining room.  I know lots of folks do that, but I haven't done it in a few years!  I think we'll enjoy decorating it for each holiday!  For Easter, I added ribbons and small baskets.


Miss Galvanized Pig greeted folks at the front door!  I'll be sharing this post with a few of the parties listed in my sidebar ... so make sure you browse those sites! If you'd like to see other Easter 2016 posts, just click through ...


Easter Red Tablescape!


I presented Easter 2016 with an "Around the World" theme, so Miss Phoebe could learn about traditions from other countries.  I love the bright red eggs that are a part of Greek traditions ... so I chose to use red as the focus for Easter. In keeping with my red decorations, which you can find here ... I created a red tablescape. The big focus was the linen ... and the red Waterford crystal stemware. Is crystal 'country'?  Yes ... when you use it with red checked flatware from Aldi's! Eclectic is always my favorite approach! 


I love the big bold pattern of the table runner, napkins and place mats ... which I used to top the checked tablecloth! I usually use my Wilton Armatale pieces ... no matter what the tablescape looks like!  Silver bunnies go with everything!


I love big family style meals and since we were going to put all the yummy food on the table, I created my 'centerpiece' on the end of the table! It is just a cluster of some of my favorite things ... lots of red checked ribbon!


While researching the Greek Easter traditions, I learned that folks in Greece decorate candles to burn during Easter Week ... so I decorated our candles.


Take a look at my treat jars! My daughter and I love the Pioneer Woman's products, and these jars are from her set. They are intended to be glasses with a lid and a straw ... but I filled them with Easter grass, all kinds of eggs ... foil wrapped chocolate carrots ... and everybody's favorite Reese's Eggs!


You'll notice that the printed dinner menu matches the fireplace banner!  I added checked ribbon bows to the menus ... If you want to see the foods from our dinner ... click right here!

If you haven't seen the other decorations ... click right here!


February's Family Sunday Dinner

Christmas 2020

Mary Queen of Scots Dinner Menu Booklet

Grandma Debbie's Christmas 2018

Grandma's Blue & Green Pupkins!

Autumn at Grandma Debbie's